


Snapchat’s CEO Evan Spiegel has announced the company’s next big step, which is the release of the much anticipated developer APIs. Snapchat will finally allow 3rd party web & mobile application developers to leverage Snapchat’s platform with deep integrations. This has been eagerly awaited by the development community as Snapchat was one of the last holdouts from the major social media networks to release an API. They cited “Privacy & Security” as the main factors behind the delay in taking this step, and given the recent climate, this was probably smart. In this post, I’ll dive into a bit more detail on not only the privacy aspects, but first let’s have a look at the feature-set and discuss some of the possibilities these new APIs bring to the table.
1. Login
There will of course be a login API called Snap Login, which doesn’t surprise anyone, given that a similar feature exists for Facebook, Twitter, Google, and a ton of other platforms. However, the difference here is that Snap will not give the developers any information beyond just the username. Developers will not be able to gather any demographics or profile information on the user, and Snapchat has explicitly said that they will never open up the user’s friends list to the developers for privacy reasons. Smart move.
2. Camera
Next up is the Snap Camera API which will enable users to be able to share content directly to their Snapchat Story from other apps. This has been a highly requested feature for some time now and it is great to see Snap take the feedback received from the app developers community to heart. Sharing experiences on Facebook & Twitter had been a breeze till now, and Snapchat was definitely starting to get left behind, so this was much needed. Imagine a scenario where you are at a birthday party, and have been taking pictures & video clips all evening. The next day, you can simply open up your Photos app, select pictures & videos from that event and create a new Story.
3. Bitmoji
Another API that is being made available will allow users to use their Bitmoji avatar in other apps, such as Messages or Tinder. Personally, I don’t get what all the fuss is about with Bitmojis and ever really understood that whole hype. But I guess it’s something the kids are doing and it was a simple enough integration for Snap to make. People apparently invest a lot of time & effort into their Bitmojis and see it as an extension of themselves. Posting reaction memes and gifs in message threads has become commonplace, so this seems to be a feature stemming from the same vein.
4. Embedding
Lastly, and perhaps the biggest API in my opinion, is one that will allow developers use public Snap (photos & videos) to create themed Stories on the web. This is where the big picture starts to become a bit clearer. Nowadays it is almost a given that an article, whether news or entertainment related, will have a tweet or two embedded within it to quote prominent people involved in the story. What Snapchat is trying to do here is recreate that lightning in a bottle, with pictures & videos. Although Instagram does already have embedding available for Insta Posts, they don’t have such a feature for Stories. Being able to create your *own* story is similar to Moments by Twitter, where you can collect a bunch of (publicly available) tweets and organize them into a Moment which can be viewed in the Twitter app, or as an embedded frame on a web site. With Snap’s new API, people will now be able to do the same, but with publicly available Snaps. This feature has the potential to capture a completely different audience than the one Snap is currently catering too, which is just what the company needs amidst growing concerns of stagnating user growth.
Data Privacy & Security
Snap has made it very clear that at the heart of this big new step will be Data Privacy & Security. All 3rd party apps will go through an approval & review process. Apple was the first company to introduce a review process for 3rd party apps to go live on its platform. Back in the day, Facebook & Android were allowing 3rd party developers to build and deploy apps without any intervention from the platform itself, while Apple was making developers go through painfully long approval processes (they used to sometimes take up to 3 weeks).
Over time however, Apple was vindicated in their decision to put security first, as the App Store quickly gained the reputation of being a secure environment for all people, regardless of technical knowledge, to safely download apps without fear. Meanwhile, Facebook was filled to the brim with spam in the form of game invites, and letting developers scrape & dump vast amounts of private user data. Android had its own share of issues with malware and spyware running rampant in their apps as their platform was as open as they get. Eventually, both Facebook & Android introduced approval processes, which have since become the norm. Snap, learning from its predecessors, has followed suit.
Conclusion
It had become apparent that Snap was losing the battle to Instagram, and that bold moves would be required in order to stay relevant in the next 5 years. While this may not be the blockbuster move that captures all the headlines, it is definitely steps in the right direction. Snap needs to be able to prove to its investors that it can grow beyond the youth demographic that it currently touts as its crowning jewel, and continue to grow. Time will tell if this will be the moment that Snap turns it around. They sure do need a win right about now.
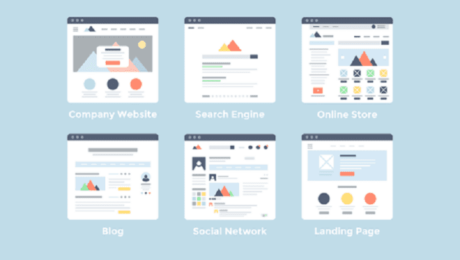
The web is vast. As of now, there are billions of websites online, all competing for some share of the attention people give to their online browsing each day. When you’re starting a new website, it can be overwhelming to think about all the other websites out there.
But it’s helpful to remember that within that huge number of websites, you have a lot of different categories of types of websites trying to accomplish different things. As you consider how best to build your own website, carefully consider what type of website you want it to be. When you can narrow down the goals and setup you have in mind, you can more easily identify the other websites in your category to look to for inspiration.
Here are twelve of the most popular types of websites you’ll see around the web. While there’s some overlap between the different categories, in general each type of website has certain goals to achieve and its own set of best practices. Which one will your website be?
1. eCommerce Website
An e-commerce website is a website people can directly buy products from. You’ve probably used a number of e-commerce websites before, most big brands and plenty of smaller ones have one. Any website that includes a shopping cart and a way for you to provide credit card information to make a purchase falls into this category.
If you’re setting up a website for your business and plan to sell your products through the site, then this is the type of website you need to build. There are some specific steps you have to be sure to include when building an eCommerce website, like investing in eCommerce software and getting your SSL certificate to ensure your customers can pay securely. And you’ll want to make sure your web design and copy are all crafted with the site’s main goal in mind: making sales. eCommerce websites can be an extension of a business you already have, or become something you build a new business around.
2. Business Website
A business website is any website that’s devoted to representing a specific business. It should be branded like the business (the same logo and positioning) and communicate the types of products and/or services the business offers.
By now, every business out there should have a website. It’s a widespread expectation. Every potential customer you encounter will just assume that if they Google your business looking for more information, they’ll find a website. And if they don’t, it makes the business look less professional or legitimate.
E-commerce websites are business websites, but it’s also possible to have business websites that don’t sell anything directly, but rather encourage visitors to get in contact for more information (a lead generation website) or come to a storefront if they’re interested in becoming customers.
3. Entertainment Website
If you think about your internet browsing habits, you can probably think of a few websites that you visit purely for entertainment purposes. They could be humor websites like The Onion, webcomics like xkcd, or just websites with fun or interesting content like Buzzfeed.
Most of these websites do aim to make money like business and e-commerce websites do, but usually through the advertisements that show up on the page rather than through selling specific products or services.
If you want to start an entertainment website, you’ve got a lot of options for formats that can take. You could make funny or informative videos, write entertaining blog posts, draw comics, or create fun quizzes.
4. Portfolio Website
Portfolio websites are sites devoted to showing examples of past work. Service providers who want to show potential clients the quality of the work they provide can use a portfolio website to collect some of the best samples of past work they’ve done. This type of website is simpler to build than a business website and more focused on a particular task: collecting work samples.
This type of website is most common for creative professionals and freelancers that are hired based on demonstrated skill and can be a more efficient alternative to a business website that serves a similar focus.
5. Media Website
Media websites collect news stories or other reporting. There’s some overlap here with entertainment websites, but media websites are more likely to include reported pieces in addition to or instead of content meant purely for entertainment. This category includes sites like the Washington Post website, Slate, and Inc.
Media websites generally make money through either advertisements that show up on the site, subscription models, or some combination of the two.
Many media websites are the online branch of media properties that often exist in other forms, like TV channels or print magazines and newspapers, but some are online only.
6. Brochure Website
Brochure websites are a simplified form of business websites. For businesses that know they need an online presence, but don’t want to invest a lot into it (maybe you’re confident you’ll continue to get most of your business from other sources), a simple brochure site that includes just a few pages that lay out the basics of what you do and provide contact information may be enough for you.
Brochure sites were more common in the earlier days of the internet when businesses knew they needed a website, but also expected not to be dependent on it for success. Now that the internet is such a big part of how people research and find just about every product and service they need, most businesses recognize that they need something more competitive.
7. Nonprofit Website
In the same way that businesses need websites to be their online presence, nonprofits do as well. A nonprofit website is the easiest way for many potential donors to make donations and will be the first place many people look to learn more about a nonprofit and determine if they want to support it.
If you have or are considering starting a nonprofit, then building a website for your organization is a crucial step in proving your legitimacy and reaching more people. You can use it to promote the projects your organization tackles, encourage followers to take action, and for accepting donations.
Note: To take donations through the website, you’ll have to take some of the same steps that the owners of eCommerce sites do. In particular, make sure you get an SSL certificate to make sure all payments are secure, and set up a merchant account so that you can accept credit card payments.
8. Educational Website
The websites of educational institutions and those offering online courses fall into the category of educational websites. These websites have the primary goal of either providing educational materials to visitors, or providing information on an educational institution to them.
Some educational websites will have advertisements like entertainment and media websites do. Some offer subscription models or educational products for purchase. And some serve as the online presence for an existing institution.
9. Infopreneur Website
Infopreneur websites overlap a bit with business and eCommerce websites, but they represent a unique type of online business. Infopreneurs create and sell information products.
Whatever form it takes, infopreneurs need their website to do the hard work of building up a knowledge brand – convincing visitors that they know enough to make their educational products worth buying – and the work of selling those products.
To sell information products securely, they’ll need some of the same tools of an eCommerce website, including an SSL certificate and a merchant account. Those with a lot of knowledge products should also invest in eCommerce software to make it easier for visitors to select and purchase the ones they’re interested in.
10. Personal Website
Not all websites exist to make money in some way or another. Many people find value in creating personal websites to put their own thoughts out into the world. This category includes personal blogs, vlogs, and photo diaries people share with the world.
Sometimes these websites can evolve into something that makes money if they become popular enough and the person who started them wants to make that shift, but they primarily exist as a way to share your feelings, insights, and art with any friends and strangers that might be interested.
11. Web Portal
Web portals are often websites designed for internal purposes at a business, organization, or institution. They collect information in different formats from different sources into one place to make all relevant information accessible to the people who need to see it. They often involve a login and personalized views for different users that ensure the information that’s accessible is most useful to their particular needs.
12. Wiki or Community Forum Website
Most people are familiar with wikis through the most famous example of one out there: Wikipedia. But wikis can be created on pretty much any subject you can imagine. A wiki is any website where various users are able to collaborate on content and all make their own tweaks and changes as they see fit. There are wikis for fan communities, for business resources, and for collecting valuable information sources.
What Type of Website Will You Create?
Whatever type of website you choose to create, it’s important to think through what you want from it and make sure you design it based on the particular goals you have in mind. And one of the first things you’ll need to figure out before your website goes live is where to host it.
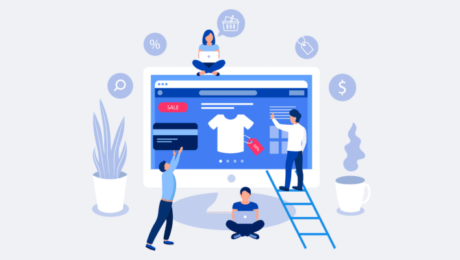
Nowadays, you can buy pretty much anything you want with a few mouse clicks or swipes of a touchscreen. From handcrafted goods to household staples, there is not much that you can’t purchase online and have conveniently shipped to your front door.
If you know how start an online store the right way, you’ll be able to boost your profits significantly and grow your business year after year.
Why is it important to understand how to start an online store if commerce is your game? Where should we start?
We are living in the midst of a digital age. In today’s world, consumers are no longer bound by one particular geographical location.
On the contrary, nowadays people have the power to connect with their peers, conduct research, consume content, and most importantly shop wherever they are in the world with a few swipes of a screen. And that means that in the current climate, if you’re an entrepreneur looking to grow your business, building an online store might be the best thing you ever do.
At present, 21.8% of the planet’s population shops online, and in 2021, this number is expected to rise to more than 2 billion online shoppers.
The current state of eCommerce
Before we delve deeper into how to start an online store, let’s explore these eCommerce stats, facts and figures that prove the power of online shopping:
- On average, men spend $220 per online transaction and women spend $151 per transaction. That’s a high-value average spend per customer.
- Online shopping is more popular than ever before and by 2021, eCommerce sales are expected to climb to 17.5% of retail sales across the globe. That’s plenty of profit up for grabs.
- During Q3 2018, smartphones made up 61% of retail site visits globally. If you’re online store is mobile-optimized, you’re likely to boost your conversion rate, big-time.
- The main reason people shop online is that they’re able to buy items or products 24/7, literally.
Realizing the full power of an eCommerce website
Just to reiterate (and we do so because absorbing this message will give you the best possible chance of easy eCommerce success): eCommerce stores give businesses the power to act big, but remain small.
Through professional and powerful, yet affordable, online storefronts, businesses can reach an extremely large market and sell to a vast and wide customer base.
Estimations of U.S. online sales for 2019 are projected to soar to over $560 billion — and that number is only expected to grow. The same projections put eCommerce sales at roughly $414 billion to more than $735 billion by 2023. Mind-blowing.
As mentioned, online stores give small businesses the opportunity to tap into a massive marketplace and an entire nation of shoppers.
Easy eCommerce: How to start an online store in 3 steps
It’s clear that if you’re a modern business, entering the eCommerce arena is a wise move. To help you start your digital journey, here’s our how-to guide to create an online store, broken down into three simple steps:
- Fine-tune your idea.
- Create your online store.
- Promote your online store.
1. Fine-tune your idea
At this point, it’s likely that you know what you want to sell. Start fine-tuning your idea by deciding on a business name, conducting market research, and finding your audience.
Consider these questions: What makes your brand stand out from others in your niche? What particular pain points do you solve?
Work out the answers to these questions and you’ll be able to move forward in the best possible direction.
Choosing your business name and domain name
When it comes to naming your eCommerce business, choosing a name that is digestible, memorable, relevant, good for digital marketing purposes and will work well as a domain name is a must.
Your domain name is the web address for your digital storefront. You want it to truly represent who you are and what you have to offer — at a glance.
There are myriad domain extensions (the part of the domain name to the right of the dot, like .com) available to help you secure the perfect name. Consider a domain extension that suits your industry or niche and that will help you stand out from the crowd. Think .shop or .store for general eCommerce, or get more specific with .jewelry, .clothing, .coffee and more.
2. Create your online store
Once you’ve considered all of the key ingredients of a successful web-based eCommerce business, it’s time to start thinking about making it happen, in a practical sense.
The simplest and fastest way to get your online shop up and running is by using a templated eCommerce store.
With this option, you get it all in one quick install. An eCommerce website package includes an online shop website template (aka website theme), product pages, shopping cart, payment processing feature and hosting for the site.
Instead of building your store piece by piece, you can install the whole store at once.
GoDaddy Online Store or HostGator Online Store both of these sites includes all of these essentials plus award-winning customer support, tools for integrating with online marketplaces, Facebook and Google Analytics, and more.
Consider these questions: What makes your brand stand out from others in your niche? What particular pain points do you solve?
3. Promote your online store
The third and final element of our how to start an online store guide comes in the form of promotion or marketing.
Once you’ve fine-tuned your idea and actually created your online store, it’s time to shout about it to your target audience.
Here we’re going to explain how to promote an online store, expand your reach, and enjoy the profit-boosting success you no doubt deserve.
There are a host of avenues you can take when marketing your online store to prospective buyers, from connecting your website to popular third-party vendors to social media, email marketing and more.
But, before we delve into these all-important areas, it’s important to reiterate the importance of spreading the word about your online store.
Why you need to promote your online store
Many small business owners think that once they have created an online store their job is done.
In fact, that’s where the fun begins. Not everyone who creates an online store is successful in making it their primary source of income. But those who are successful have a few common characteristics:
They love their customers
Ask any successful online seller what they like about their business and they will have a ton of heart-warming customer stories on the tips of their tongues. They live for making their customers’ lives better.
They are scrappy and savvy marketers
The most successful online sellers have figured out a way to spread the word in their customer community. Some do it through social media marketing. Others identify influencers in their community and have them promote their product. Some business owners come up with clever viral marketing campaigns by promoting their products with special discounts.
Conclusion and next steps
eCommerce is not an industry; eCommerce is a tactic. – Tobias Lutke
An eCommerce website can open a large, new frontier for your business. You will be able to sell to millions around the world instead of the thousands in your neighborhood. You will be able to tap into a billion dollar market. And, you will be able to give your business an opportunity to expand and grow with minimal risk and low investment costs.
Once you’ve fine-tuned your idea with a great name and thorough market testing, an easy eCommerce website is just a few steps away.
Begin with a few products that you showcase on your eCommerce site with stellar photos and product descriptions. Prompt store visitors to take action with compelling CTAS and authentic customer testimonials and reviews. Make it easy for customers to pay via various methods. Offer multiple shipping options — including free shipping.
These are the basics that will get your online store up and running.
Then you can focus on expanding your product line and growing your business through digital marketing techniques such as email marketing, social media and online business listings.
Now that you know how to create an online store, get going and make those dreams a reality.
Introduction
In the early days of personal computing, PCs were all stand-alone machines that had difficulty talking with one another. While it is still possible to run a similar setup, nowadays called a workgroup, there is another option availble: The directory service.
In short, a directory service stores information regarding objects on your network. These objects can be computers, users, groups, etc.
Active Directory (AD) is a directory service that was developed specifically for Microsoft Windows domains and comes packaged with most versions of Windows Server. If you’ve worked with a Windows network, you’ve likely interacted with AD at some point.
In this article, we’ll go over some basics of AD and talk about how it can make life easier (when it comes to managing your Windows network, anyhow).
What is AD used for?
First off we’re AD has many different tasks that are defined by roles. Primarily, though, AD is used as a directory for objects (it is a directory service, after all). These objects help control access rights, authentication, tasks, policies, etc.
Also, while not strictly more secure than using a workgroup, AD does provide some ease in security management. For example, security rights can be controlled from a central location by a single admin. This prevents a jumble of security rights spread across different machines on the network.
In addition, AD provides the infrastructure necessary to utilize other Microsoft tools such as Group Policy and Exchange.
Getting started with Active Directory
Unless you’re setting up a new domain, AD is likely already installed. Still, AD and its various components can be installed within Server Manager at Start > Administrative Tools > Server Manager.
You’ll find the various AD components under the Roles list and can add individual components by clicking Add Roles. Don’t worry I will explain the role with a little depth in just a bit.
Once AD is installed, it can be accessed from Start > Administrative Tools. Depending on what you’ll be doing, you may be working with one of many AD roles listed below.
Understanding AD Roles
Active Directory consists of several roles that work together to provide full directory services for your Windows network.
- Active Directory Domain Services is the core of AD. It provides the hierarchy structure for network objects such as computers, users, groups, etc.
- Active Directory Users and Computers allows for creating, editing, and viewing of users and computers within AD. This is where many folks spend most of their time working with AD.
- Active Directory Federation Services allows for securing sharing of information, specifically identification-related information, between trusted entities. It enables features like Single Sign-On (SSO).
- Active Directory Lightweight Directory Services acts like an independent version of AD. It is most often used to provide a directory service for testing and development.
- Active Directory Rights Management Services is AD’s information rights management (IRM) component. It uses encryption and functionality denial techniques to limit document access.
- Active Directory Certificate Services allows for a public key infrastructure as well as the creation of digital certificates and signatures.
Conclusion
Active Directory is a helpful tool when managing a Windows environment. It provides different roles to handle a myriad of tasks and allows for easier management of user rights, file permissions, and other security-related tasks compared to a simple workgroup. In addition, it allows the addition of other Microsoft tools like Group Policy and Exchange.

When you want to give the background color to the view, but you want to add more colors and get the gradient effect, you need to add a layer to view,
which we are going to create, in few lines of code.
- Create a CAGradientLayer
var gradientLayer: CAGradientLayer = {
   let gradientLayer =CAGradientLayer()
   gradientLayer.colors = [#Color1, #Color2] //note: colors you want to use
   gradientLayer.startPoint = CGPoint(x:0 y:0)
   gradientLayer.endPoint = CGPoint(x:1 y:1)
   gradientLayer.frame= CGRect.zero
   return gradientLayer
} ()
- Add gradientLayer to the view layer
currentView.layer.addSublayer(gradientLayer)
- Set frame of the gradientLayer
gradientLayer.frame = currentView.bounds


According to Wikipedia, an Environment Variable is a dynamic-named value that can affect the way running processes will behave on a computer. They are part of the environment in which a process runs. Basically, many developers create 3 environments
- Dev
- Preprod
- Prod
Sometimes we need to separate the base URL and do the initial work which should be done for the following state or condition only.
Create enum for environments
if you need a refresher on enum check out the following article
enum Environment {
   case dev
   case preprod
   case prod
}
Environment Variable
let currentEnvironment = Environment.dev
Execute using a switch statement
switch currentEnvironment {
   case .dev:
       print("execute only if the environment is development")
   case .preprod:
       print("execute only if the environment is preprod")
   case .prod:
       print("execute only if the environment is prod")
   default:
   break
}
Execute code now
First, we initialize the currentEnvironment variable and using conditions use it. Now we can change the baseUrl in AppDelegate along with other interesting code.
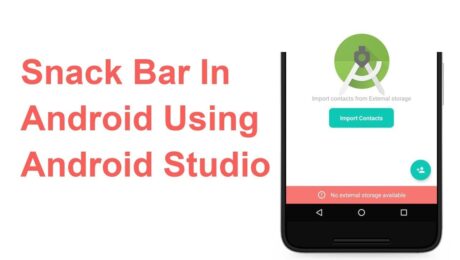
Android Snackbar is an interesting component introduced with the Material Design. Snackbars are very similar to the Toast messages with a few exceptions but the biggest is that provide action to interact with. Snackbar will be displayed at the bottom of the screen and can be swiped away in order to dismiss them.
Major Difference between Toast and Snackbar messages
- Toast message can be customized as well as displayed anywhere on the screen, however, Snackbar can be only shown at the bottom
- Toast messages cannot display action controllers but Snackbars optionally can display them
- Toast message remains on the screen until their time limit is mean but Snackbars can be swiped off before time expiring
note: similar to toast you have three different values for time limit
Implementing Snackbar
To begin this project is being created in Android Studio but any IDE that has the SDK for development can produce the same result. We begin by opening the ide and selecting “Create New Project”. Select “Empty Activity” and fill out the detail of the application and make sure with “Language” you select Java.
note: if you’re using Kotlin please review this tutorial
After the project is created open build.gradle and add the latest stable Material Design Dependency.
dependencies {
     implementation 'com.google.android.material:material:1.3.0'
}
By using the material dependency, you can also create components like Cardview, Recyclerview, and other things as well… If interested in learning to incorporate other material components review the below links.
Styling the App
<style name="AppTheme"
    parent="Theme.MaterialComponents.Light.NoActionBar">
    <item name="colorPrimary">@color/colorPrimary</item>
    <item name="colorPrimaryDark">@color/colorPrimary</item>
    <item name="colorAccent">@color/colorPrimary</item>
</style>
Method Creation
Open your MainActivity.java and we will begin by creating the following methods:
- Basic Snackbar
- As you can see the syntax is the default setup of the Snackbar. Please take note of the make function which accepts the following parameters. View, expected message to display and then the duration of the message to display.
public void basicSnack(View v){
    Snackbar sb = Snackbar.make(cl, "This is a basic Snackbar Display", Snackbar.LENGTH_SHORT);
    sb.show();
}
- Action Basic Snackbar
- Within this method, we reference a callback interaction using setAction(). This allows you to take a certain action when the user interacts with a Snackbar
public void basicActionSnack(View v) {
    Snackbar sb = Snackbar.make(cl, "Snackbar with Action Feature", Snackbar.LENGTH_SHORT);
    sb.setAction("Undo", new View.OnClickListener() {
        @Override
        public void onClick(View v) {
            Toast.makeText(getApplicationContext(), "Undo action", Toast.LENGTH_SHORT).show();
        }
    });
    sb.show();
}
- Custom Basic Snackbar
- By default, Snackbar text color is set to white with the default background #323232 but these features can be overwritten
public void basicCustomSnack( View v) {
    Snackbar sb = Snackbar.make(cl, "Custom Snackbar", Snackbar.LENGTH_SHORT);
    sb.setAction("Undo", new View.OnClickListener() {
        @Override
        public void onClick(View v) {
            Toast.makeText(getApplicationContext(), "Undoing Action", Toast.LENGTH_SHORT).show();
        }
    });

    sb.setActionTextColor(Color.CYAN);
    View sbv = sb.getView();
    TextView tv = sbv.findViewById(R.id.snackbar_text);
    tv.setTextColor(Color.GREEN);

    sb.show();
}
Let’s check the completed code
<!-- main activity xml-->
<?xml version="1.0" encoding="utf-8"?>
<androidx.coordinatorlayout.widget.CoordinatorLayout
    xmlns:android="http://schemas.android.com/apk/res/android"
    xmlns:app="http://schemas.android.com/apk/res-auto"
    android:layout_width="match_parent"
    android:layout_height="match_parent"
    android:id="@+id/app_Coordinator"
    android:fitsSystemWindows="true"
    android:orientation="vertical">

    <com.google.android.material.appbar.AppBarLayout
        android:layout_width="match_parent"
        android:layout_height="wrap_content"
        android:background="?attr/colorPrimary">

        <androidx.appcompat.widget.Toolbar
            android:layout_width="match_parent"
            android:layout_height="?attr/actionBarSize"
            android:id="@+id/toolbar"
            android:theme="@style/ToolbarStyle"
            app:title="@string/app_name"
            app:popupTheme="@style/ThemeOverlay.AppCompat.Light" />

    </com.google.android.material.appbar.AppBarLayout>
    <include layout="@layout/app_content" />

    <com.google.android.material.floatingactionbutton.FloatingActionButton
        android:layout_width="wrap_content"
        android:layout_height="wrap_content"
        android:layout_gravity="bottom|end"
        android:layout_margin="10dp"
        android:src="@drawable/ic_add_black"
        android:contentDescription="TODO" />
</androidx.coordinatorlayout.widget.CoordinatorLayout>
<!--container xml -->
<?xml version="1.0" encoding="utf-8"?>
<androidx.appcompat.widget.LinearLayoutCompat xmlns:android="http://schemas.android.com/apk/res/android"
    android:layout_width="match_parent"
    android:layout_height="wrap_content"
    xmlns:app="http://schemas.android.com/apk/res-auto"
    app:layout_behavior="@string/appbar_scrolling_view_behavior"
    android:padding="10dp"
    android:orientation="vertical">

    <androidx.appcompat.widget.AppCompatButton
        android:layout_width="match_parent"
        android:layout_height="wrap_content"
        android:text="@string/basic_snack"
        android:onClick="basicSnack" />

    <androidx.appcompat.widget.AppCompatButton
        android:layout_width="match_parent"
        android:layout_height="wrap_content"
        android:text="@string/basic_action_snack"
        android:onClick="basicActionSnack" />

    <androidx.appcompat.widget.AppCompatButton
        android:layout_width="match_parent"
        android:layout_height="wrap_content"
        android:text="@string/basic_custom_snack"
        android:onClick="basicCustomSnack" />

</androidx.appcompat.widget.LinearLayoutCompat>
// main activity
public class MainActivity extends AppCompatActivity {
    private CoordinatorLayout cl;
    private Toolbar tb;

    @Override
    protected void onCreate(Bundle savedInstanceState) {
        super.onCreate(savedInstanceState);
        setContentView(R.layout.activity_main);

        cl = findViewById(R.id.app_Coordinator);
        tb = findViewById(R.id.toolbar);
        setSupportActionBar(tb);
    }

    public void basicSnack(View v){
        Snackbar sb = Snackbar.make(cl, "This is a basic Snackbar Display", Snackbar.LENGTH_SHORT);
        sb.show();
    }

    public void basicActionSnack(View v) {
        Snackbar sb = Snackbar.make(cl, "Snackbar with Action Feature", Snackbar.LENGTH_SHORT);
        sb.setAction("Undo", new View.OnClickListener() {
            @Override
            public void onClick(View v) {
                Toast.makeText(getApplicationContext(), "Undo action", Toast.LENGTH_SHORT).show();
            }
        });

        sb.show();
    }

    public void basicCustomSnack( View v) {
        Snackbar sb = Snackbar.make(cl, "Custom Snackbar", Snackbar.LENGTH_SHORT);
        sb.setAction("Undo", new View.OnClickListener() {
            @Override
            public void onClick(View v) {
                Toast.makeText(getApplicationContext(), "Undoing Action", Toast.LENGTH_SHORT).show();
            }
        });

        sb.setActionTextColor(Color.CYAN);

        View sbv = sb.getView();
        TextView tv = sbv.findViewById(R.id.snackbar_text);
        tv.setTextColor(Color.GREEN);

        sb.show();
    }
}
To conclude
I hope you found this reading helpful and if you need further assistance don’t hesitate to contact me for additional assistance. If you are also interested in seeing other tutorials that are not present please hit my line and with
Welcome to Kallyas Network. This is your first post. Edit or delete it, then start blogging!